OpenRadioss with Visualization Using ParaView on Oracle Cloud

This guide provides you with a fast-track path to run OpenRadioss simulations and use ParaView to visualize the results. CIQ created builds of OpenRadioss and ParaView and packaged them into a single Rocky Linux 9 image published in the Oracle Cloud marketplace. In this guide, we’ll provide some of the details of the effort and, most importantly, the instructions to try out OpenRadioss simulations quickly. By following the instructions in this guide, you can try a sample workload or give your own workload a go!
OpenRadioss is an industry-proven open source Finite Element Analysis solver recently provided by Altair. More information, community support of the code, and additional workloads may be found on the OpenRadioss community website.
ParaView is an award-winning open source visualization application.
Rocky Linux is a popular Linux distribution across all domains, including scientific applications like OpenRadioss. CIQ is a founding partner in Rocky Linux, the Rocky Linux Enterprise Software Foundation, and also provides professional support for Rocky Linux.
As a prerequisite to executing this workflow, you will need to have an account on Oracle Cloud. This guide does not cover the instructions for setting up an account.
Minimizing the cost of running in the cloud
The instructions for executing OpenRadioss and ParaView in Oracle Cloud take into account that running in the cloud is not free. With that in mind, this section provides some background on minimizing the cost of running in the cloud.
The primary cost-efficient consideration comes down to selecting the right compute instance shape for each part of the workflow. OpenRadioss executes its solver on CPUs, while ParaView needs GPU power for the visualization. The cost of a GPU instance shape is much higher, typically, than a shape with just CPUs. If we choose one instance shape that satisfies both requirements, then the overall cost of execution will be greater. Instead, this guide uses a two-step workflow. The first uses a CPU only shape to execute the OpenRadioss simulation. The second uses a shape with an NVIDIA GPU to visualize the results. While there are additional steps to perform, this is overall a more cost effective path. Otherwise, while OpenRadioss is solving your workload, you’re paying for a GPU that is sitting idle.
Workflow step 1: OpenRadioss simulation
In this example, we will run an OpenRadioss crash simulation using a 2019 generic mid-size ADS vehicle model from CCSA. For the first step in the workflow, we will use an AMD CPU shape with 64 CPU cores to run the OpenRadioss workload.
Create the instance on Oracle Cloud
Create an instance that has 64 cores and 64 GB of memory for the OpenRadioss workload.
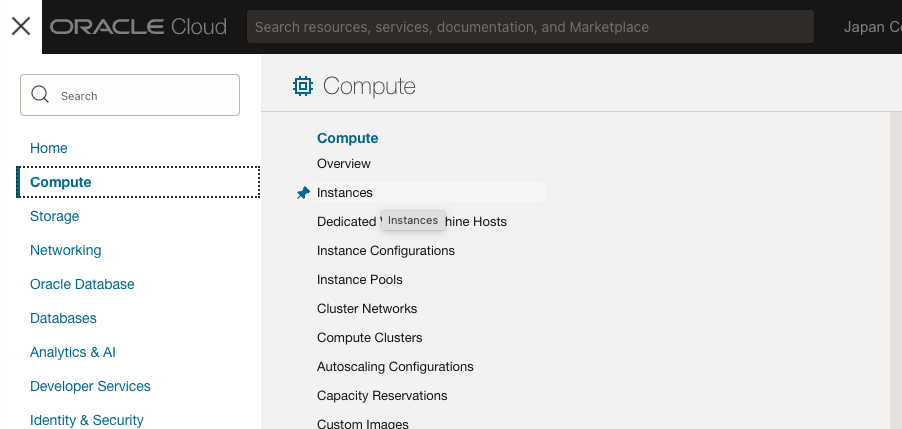
This screen appears right after logging in to Oracle Cloud. Click the top left corner to open the menu.

Click Compute > Instances.
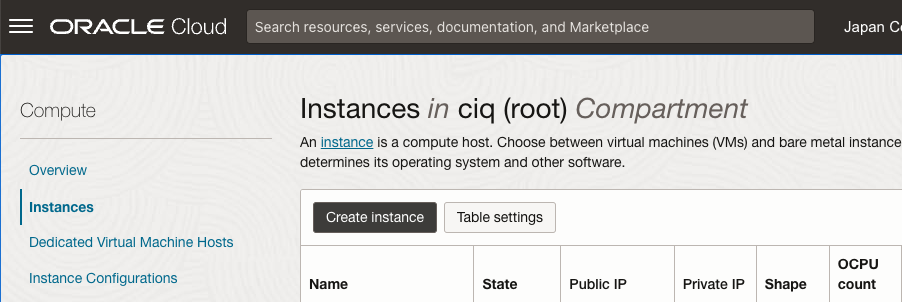
Click “Create Instance.”
It shows many options, but first we are going to choose the Rocky Linux image and then the shape of the instance.
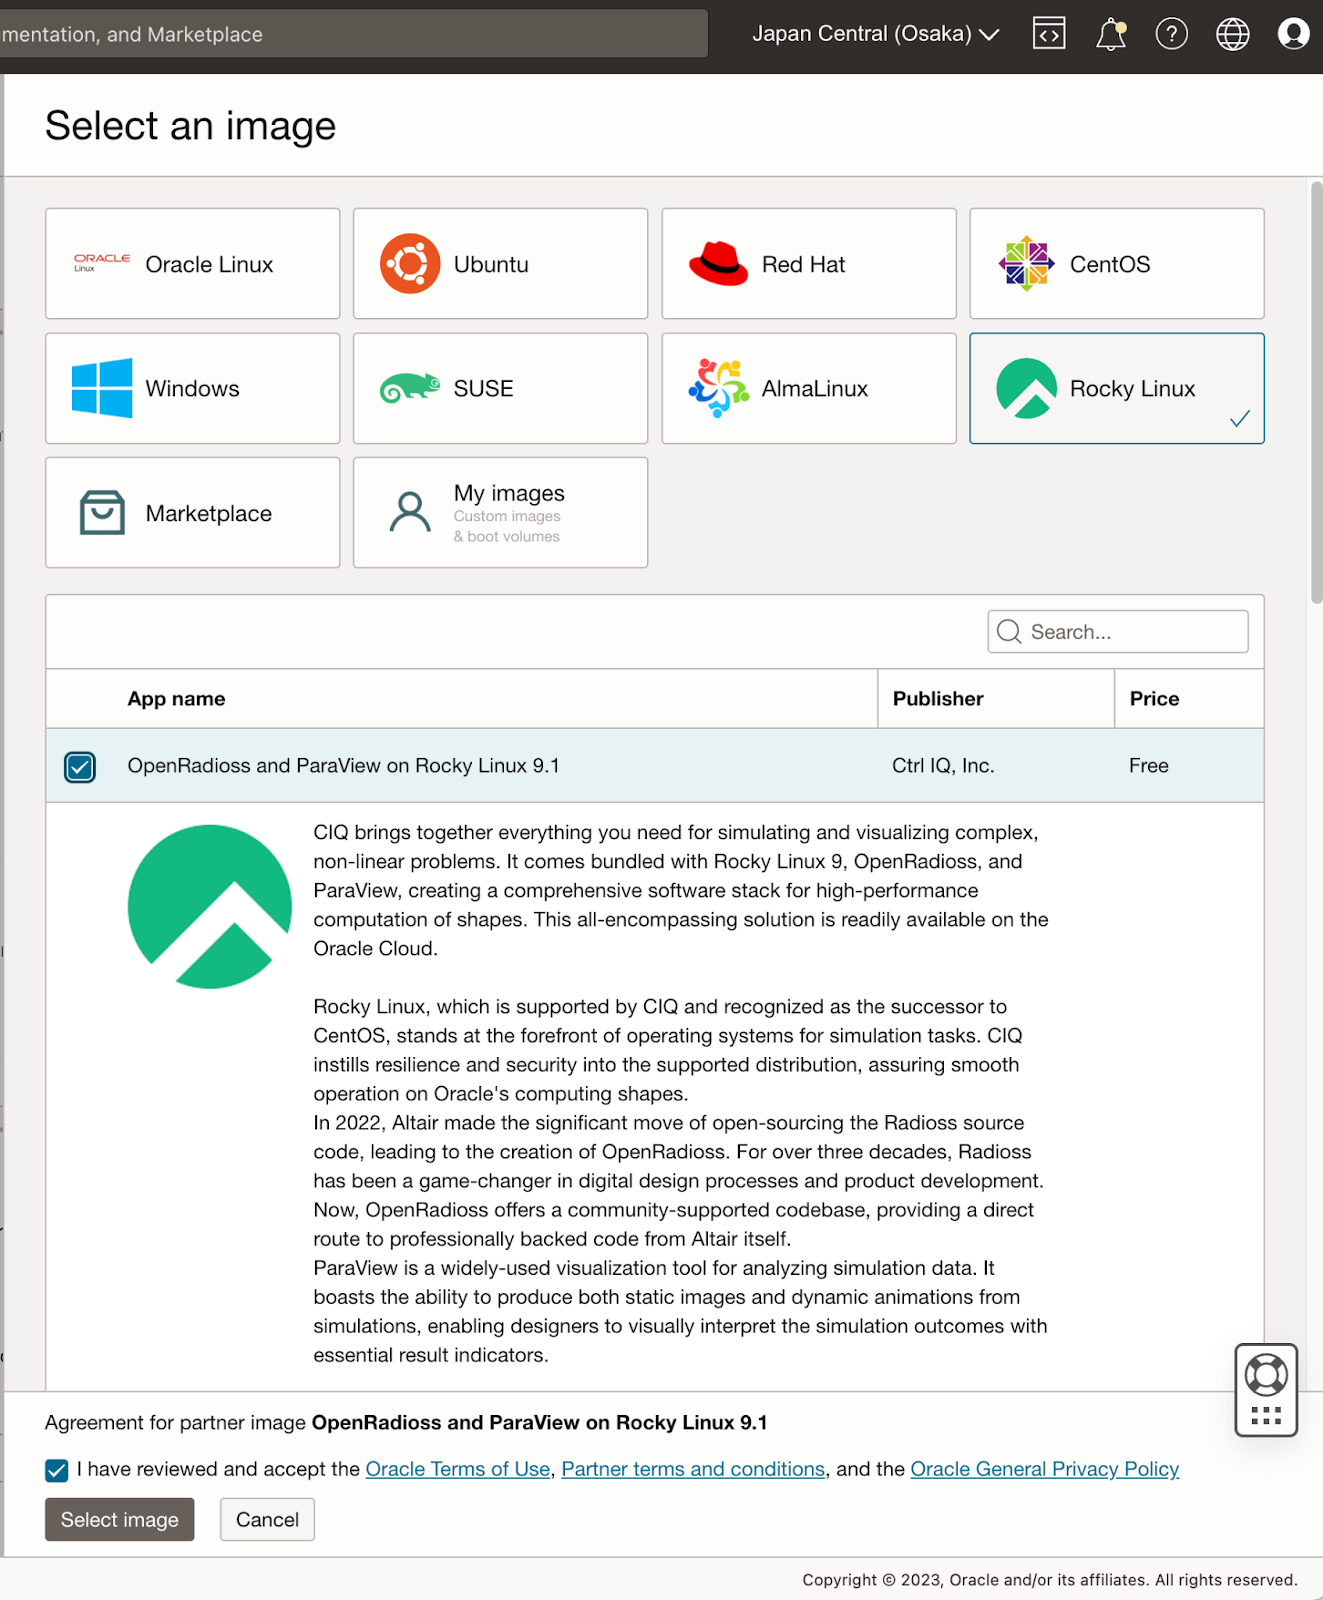
Click “Change image.”

Select “Rocky Linux,” and then select the “OpenRadioss and ParaView on Rocky Linux 9.1” from the list.
Click “Change shape,” maximize “Number of OCPUs” to 64 cores, and specify “Amount of memory (GB)” to 64 GB.

This is after you choose the image and shape.

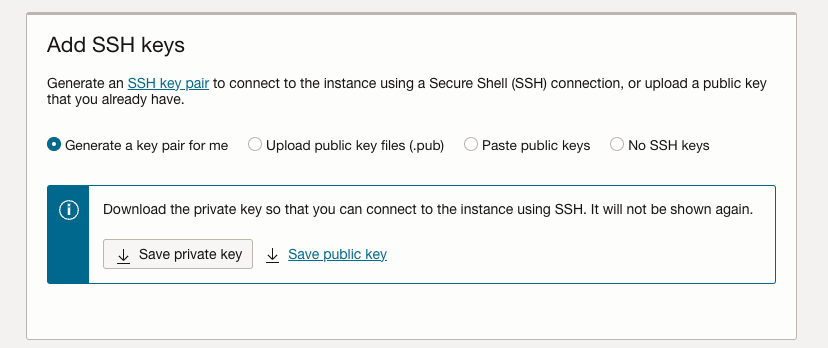
Click “Save private key” and “Save public key” to download keys for SSH. We use the private key to SSH log-in to the instance we created here, and we use the public key when we create other GPU-equipped instances for visualization.
Now you have two keys under the Downloads directory (depending on your environment and how you saved those keys); one is like “ssh-key-yyyy-mm-dd.key.” This is the private key that we use for SSH log-in, and the other is like “ssh-key-yyyy-mm-dd.key.pub.” This is the public key that we use when we create other instances.
Open your terminal and then type the following to attach read write permission only to the current user; otherwise, SSH log-in fails. This procedure is only required for MacOS and Linux users.
$ chmod 600 ~/Downloads/ssh-key-2023-05-08.key
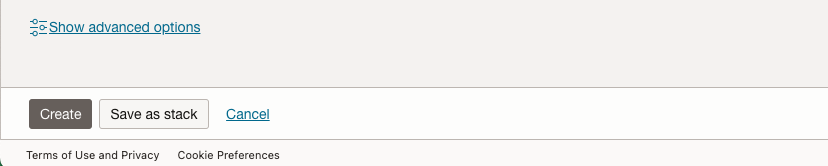
Click “Create.”
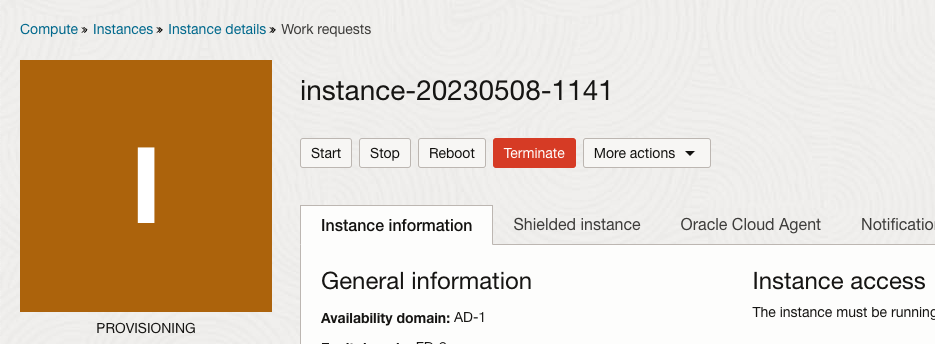
The instance is in a “provisioning” state for usually less than a minute.
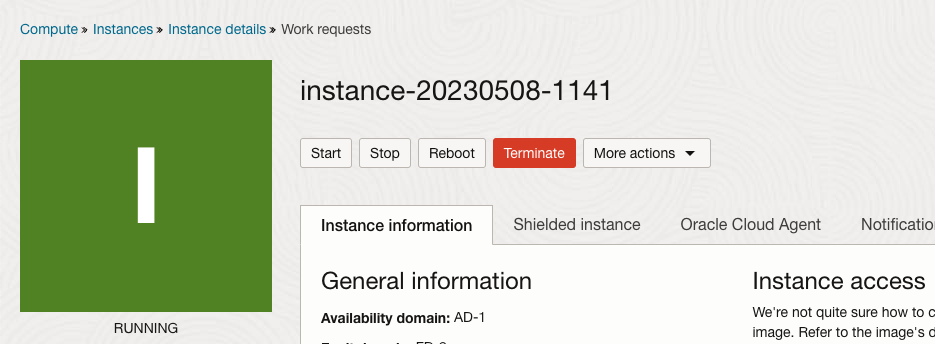
When your instance becomes “running” state, you can SSH log-in to this instance. Sometimes you need to wait a bit after an instance becomes a “running” state, due to the cloud-init script still running, etc.
SSH
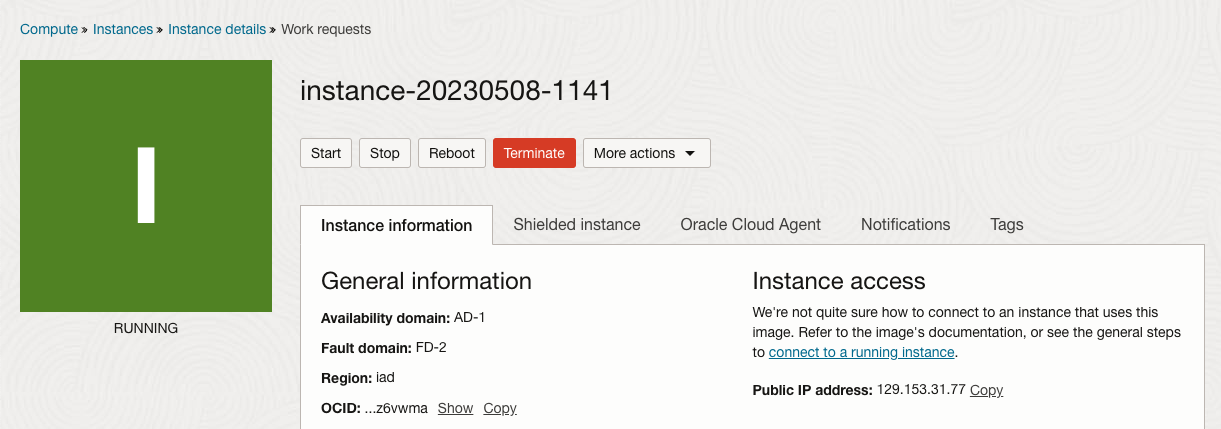
Let’s SSH log-in to the instance just created. For SSH log-in, we need the IP address of the instance, username, and SSH key. The IP address of the instance is shown on the “Instance access” section of the Instance details page. The username is “rocky” and the SSH key is the private key that we downloaded when we created the instance.
Open your terminal (when you use Windows, it’s “Windows Terminal”; when you use MacOS, it’s “Terminal”), and then type the following to SSH log-in to the instance.
$ ssh -i ~/Downloads/ssh-key-2023-05-08.key rocky@129.153.31.77

This is what you see with a successful SSH log-in to the instance.

Type “htop” and hit Enter.

This shows the instance we just created has 128 cores. This is because AMD Simultaneous Multithreading (SMT) is enabled. We use 64 cores for our simulation, since AMD SMT and Intel HT don't contribute to the performance of OpenRadioss and HPC applications in general.
Type “q” to quit “htop.”
Run the simulation
Preparing input files
Move to “Simulation” directory.
Unarchive “2019-generic-mid-size-ads-vehicle-v1.zip.”
Copy “ADSOpenRadioss.key.”
Move to “2019-generic-mid-size-ads-vehicle-v1" directory.
$ cd Simulation
$ unzip 2019-generic-mid-size-ads-vehicle-v1.zip

Archive:  2019-generic-mid-size-ads-vehicle-v1.zip

2019 Generic Mid-size ADS Vehicle Model

Center for Collision Safety and Analysis

George Mason University

  inflating: 2019-generic-mid-size-ads-vehicle-v1/README.txt

  inflating: 2019-generic-mid-size-ads-vehicle-v1/combine.key

  inflating: 2019-generic-mid-size-ads-vehicle-v1/gmu-ccsa-generic-mid-size-ads-vehicle-v1.key

  inflating: 2019-generic-mid-size-ads-vehicle-v1/wall.key

$ cp ADSOpenRadioss.key 2019-generic-mid-size-ads-vehicle-v1

$ cd 2019-generic-mid-size-ads-vehicle-v1
Decompose simulation input data
Use “tmux,” terminal multiplexer, here. This is convenient when you want to exit your terminal while the simulation is still running or when you lose connection while the simulation is still running. “Tmux” creates a session, and you can detach from that session without stopping your simulation.
$ tmux
Decompose simulation input data for 64 processes MPI parallel simulation.
$ openradioss.sif
Apptainer> starter_linux64_gf -i ADSOpenRadioss.key -np 64
Run simulation
Run the crash simulation. It takes about 40 minutes.
Apptainer> mpirun -np 64 engine_linux64_gf_ompi -i ADSOpenRadioss_0001.rad
This is optional, but let’s check out CPU usage with “htop” for fun.
Press keys “Ctrl + b” and then press key “d.” This makes you detach from the current session, such as the OpenRadioss simulation terminal session.
Then, type the following and press Enter.
$ htop
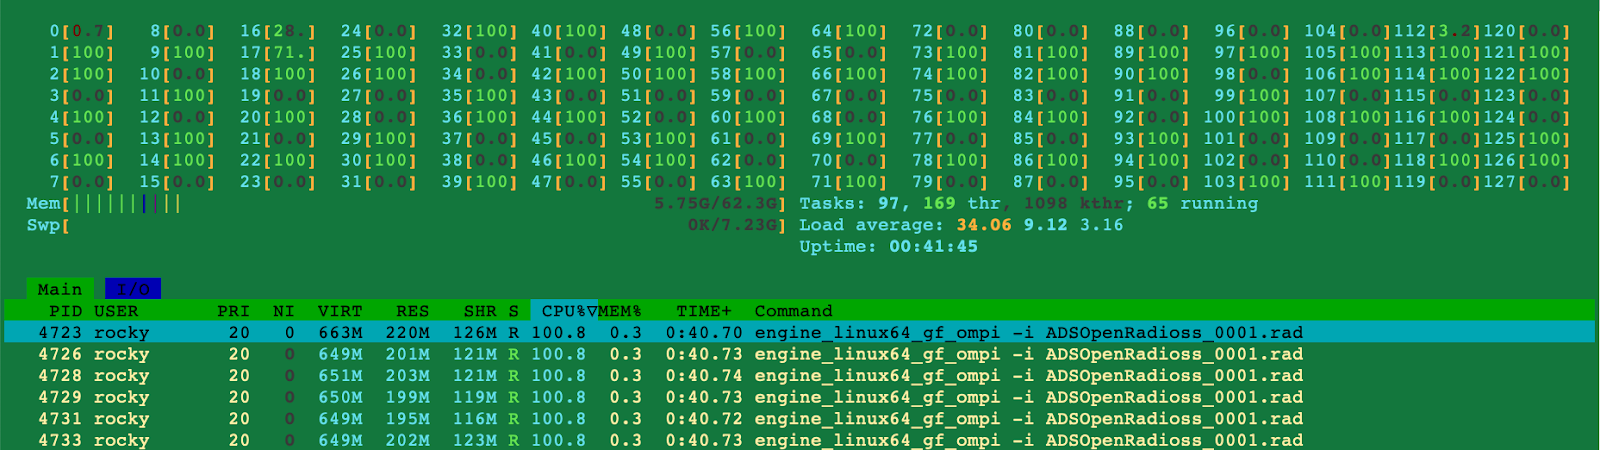
This shows the simulation utilizes 64 cores on your instance.
Let’s get back to the OpenRadioss simulation session. Type “q” to quit “htop” and then type the following to attach to the session:
$ tmux attach -t 0
When the simulation is finished, it will show you something like this:
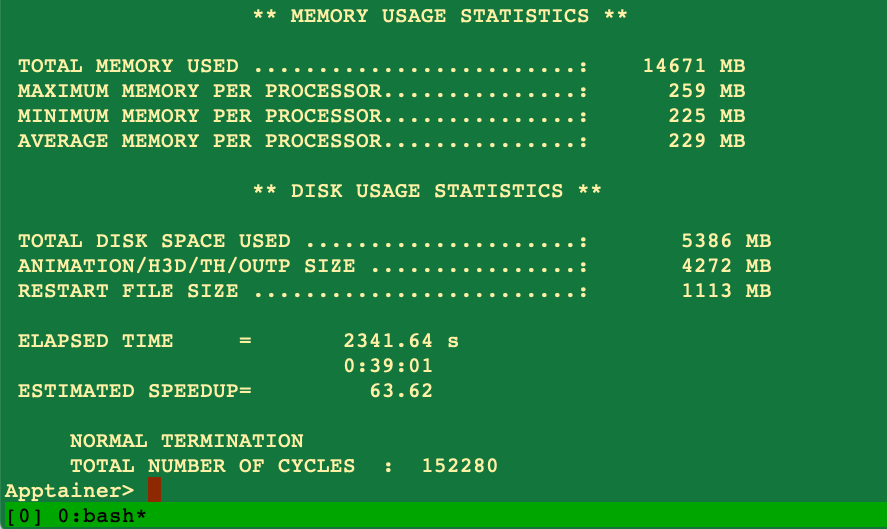
64 cores with “ESTIMATED SPEEDUP" of 63.62 looks like pretty good performance. If you wish to accelerate more, you will need multiple nodes set up, and an HPC cluster. That is indeed an interesting topic, but it is not covered in this article.
Prepare output data for ParaView visualization
OpenRadioss produces visualization data in ANIM format, but ParaView does not have a plugin for reading ANIM format. That means we need to convert ANIM format data to VTK format, which is the primary supported data format by ParaView.
Let’s convert the ANIM format data to VTK format data. It takes about 5 minutes to finish.
$ seq -f ADSOpenRadiossA%03g 076 | xargs -I{} sh -c 'openradioss.sif anim_to_vtk_linux64_gf "$1" > "$1.vtk"' -- {}
If you didn’t finish your simulation during the previous step, don’t worry. The custom image we use here has sample VTK files. Please use VTK files under ~/Visualization if you don’t have your own data.
Terminate the CPU instance
We have done CPU-intensive workloads such as the OpenRadioss simulation, so let’s terminate the instance. Please keep in mind that we will reuse the disk (boot volume) that we just used for the OpenRadioss simulation.
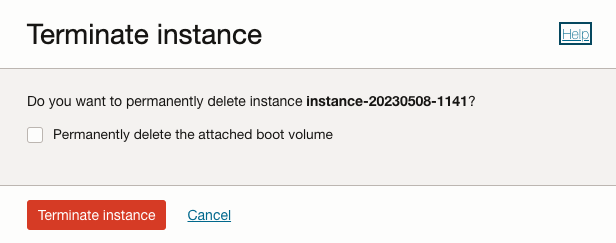
Click “Terminate.”

Please leave the following checkbox unchecked; we would like to use this boot volume that contains data for visualization. We can create a GPU-equipped instance from this boot volume in later steps.
Click “Terminate instance.”
It takes less than a few minutes to be terminated.

After the instance has terminated, please move on to the next step.
Workflow step 2: visualizing with ParaView
Create an instance for the visualization workload from the same boot drive that is used for the OpenRadioss simulations.
Click “Create instance.”
Click “Change image.”
Click “My images,”
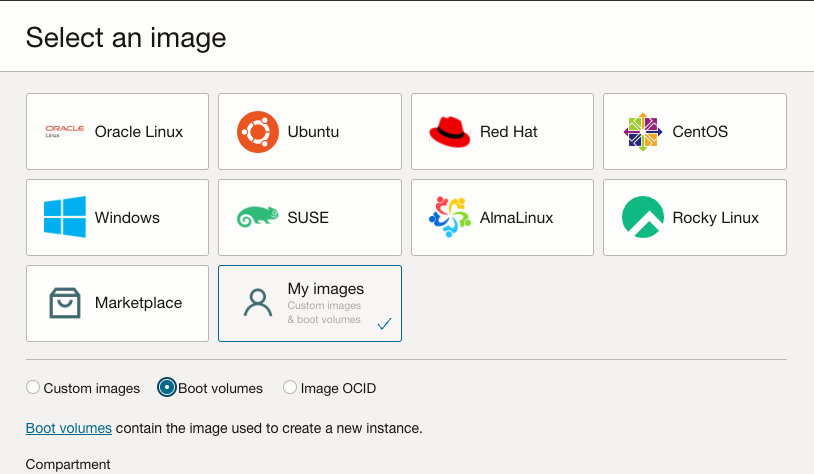
and then click “Boot volumes.”
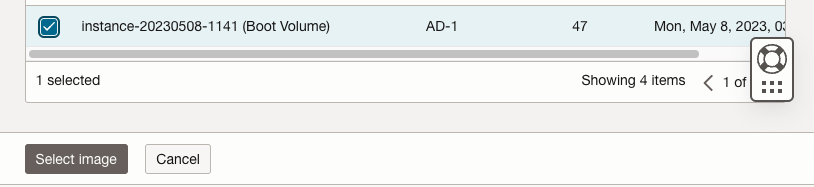
Choose Boot volume and click “Select image.”
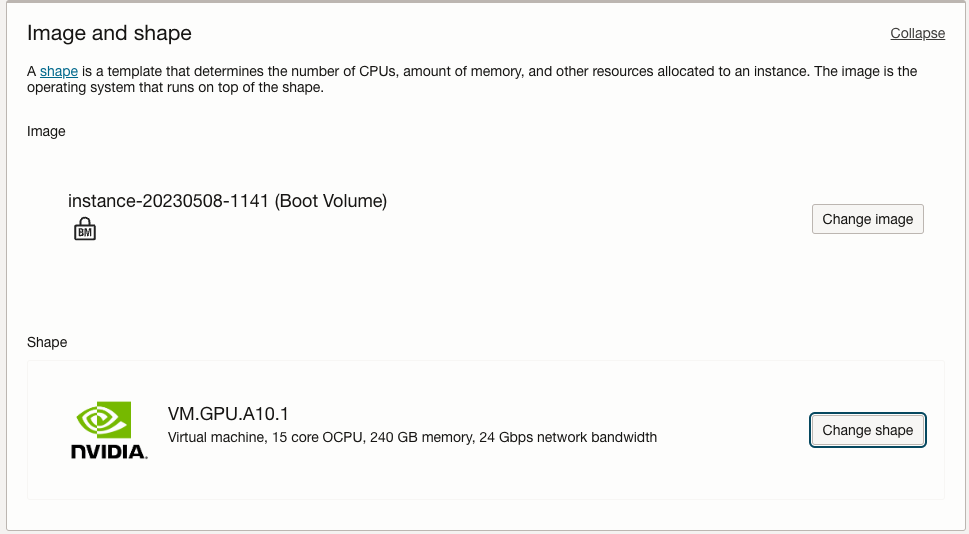
Next, click “Change shape.”

This time, we use the NVIDIA GPU-equipped shape. Click “Specialty and previous generation.”

Click the “VM.GPU.A10.1” shape that has a NVIDIA A10 GPU and 15 cores Intel Xeon processor, and then click “Select shape.”

Now it looks like this:
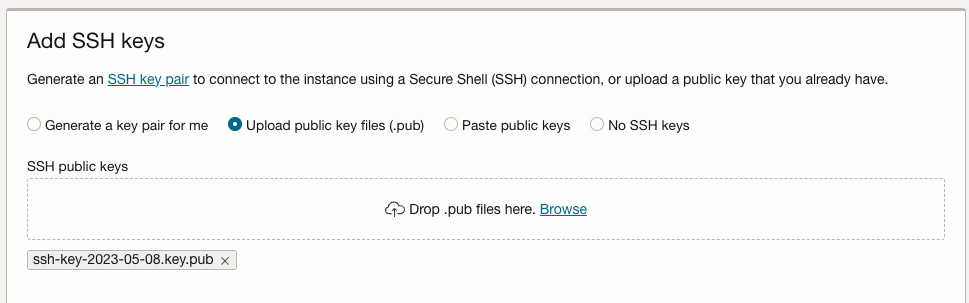
Next, let’s look at SSH key settings. This time we upload the public key that we downloaded when we created an instance for the OpenRadioss simulation.
Click “Upload public key files (.pub),” and then click “Browse.”

Select your public key and then click “open.”
Now it looks like this:
We are ready to go! Click “Create.”
SSH
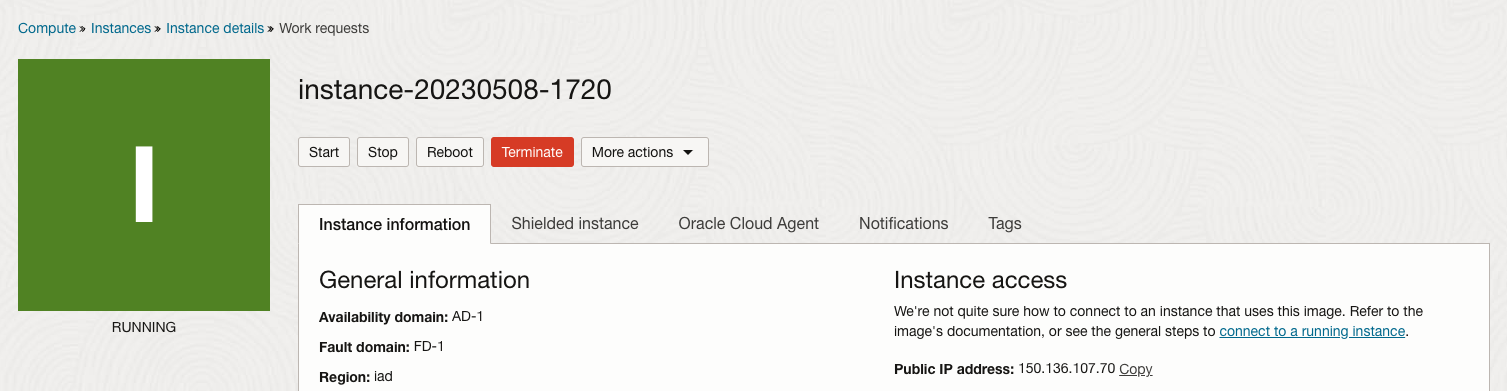
After the newly created instance becomes the “Running” state, SSH log-in to the instance.
Username is the same as “rocky” and the ssh key is also the same “ssh-key-yyyy-mm-dd.key”; only the IP address is changed here. Please check the new IP address that is assigned to the instance.
$ ssh -i ~/Downloads/ssh-key-2023-05-08.key rocky@150.136.107.70
Optional: Verify the GPU driver is loaded
If you follow these instructions verbatim, you’ll be following a path that has been verified, meaning everything should be working. It’s never a bad idea, though, to do a quick verification that the GPU is up and running. You can use the following command to verify that the NVIDIA driver is running.
$ nvidia-smi
You can also monitor GPU activity using “nvtop”:
$ nvtop
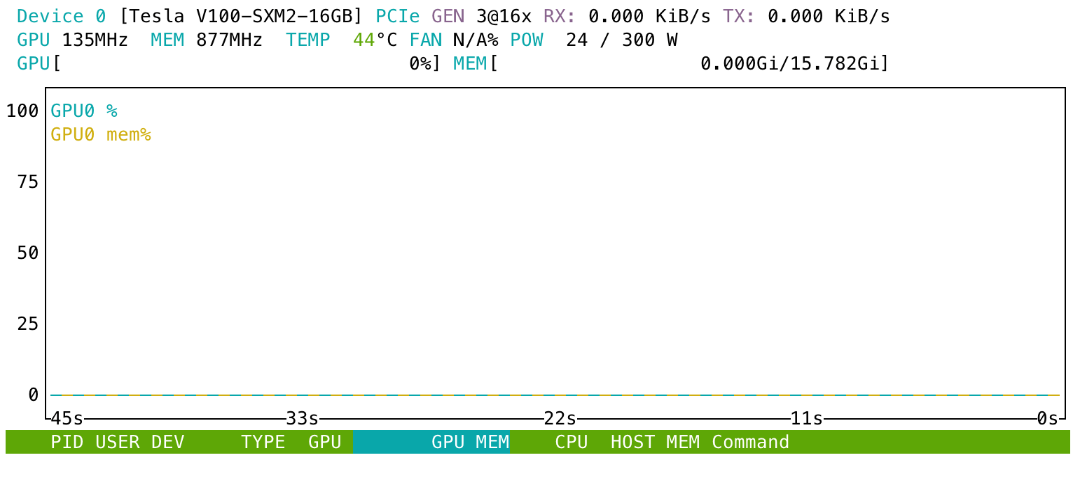
Type “q” to quit “nvtop.”
Start ParaView server
$ pvserver

Client side
Install the ParaView client
Download the exact same version (v5.11) of the ParaView client from the official download page https://www.paraview.org/download/. You can use Windows, Linux, and MacOS for client side OS.
SSH port forward
Before you connect to the ParaView server on OCI, forward port 11111 on the GPU instance to port 11111 on the local PC using SSH. This way, we don’t need to open port 11111 on the OCI side.
$ ssh -i ~/Downloads/ssh-key-2023-05-08.key -L 11111:localhost:11111 rocky@<INSTANCE IP HERE>
Connect the ParaView client to the ParaView server on OCI
Launch ParaView and click File > Connect.
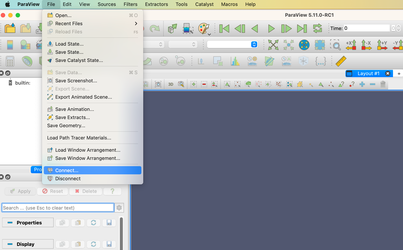
Connect to “localhost:1111.”

Click “Open.”
Double click “Visualization.”
Select “ADSOpenRadiossA..vtk” and click “OK.”

Click “Apply.”

Now you can see the rendered VTK file.

Set view direction to “-Y.”
Select “2DLEM_Stress_(lower).”
Set Range “0-256.”

Change “Time” to 23.

Lastly, click “ParaView” and then click “About ParaView” when you use MacOS; that shows the GPU device and GPU driver version that the ParaView server running on Oracle cloud resource is being used for this session.

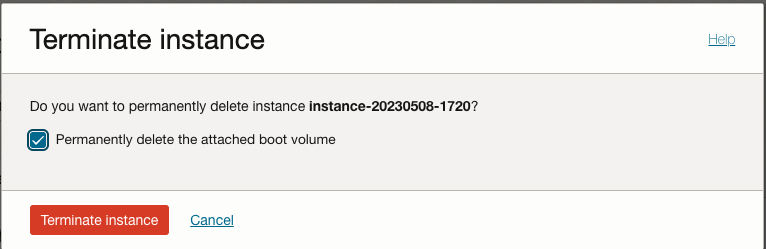
Terminate the GPU instance
After finishing the visualization, let’s terminate the GPU instance. This time, we can delete the boot drive.

Check “Permanently delete the attached boot volume” and then click “Terminate instance.”
Summary
We walked through the car crash simulation to its visualization using the newly published OpenRadioss / ParaView Rocky Linux 9-based image on OCI and appropriate shape for each task.
Appendix A: Attaching extra drive
If you’d like to play with all of the examples in this image, understand that the default boot drive doesn’t have enough space. In this section, we provide instructions on how to create extra drives and attach them to your instance.
Click the top left corner to open the menu, and then click “Storage,” “Block Volumes.”

Click “Create Block Volume.”

Type a name for the block volume and then click “Create Block Volume.” The default size of the block volume is 1024 GB.

Provisioning will take less than a few minutes.

When block volume becomes an available state, we are good to go.

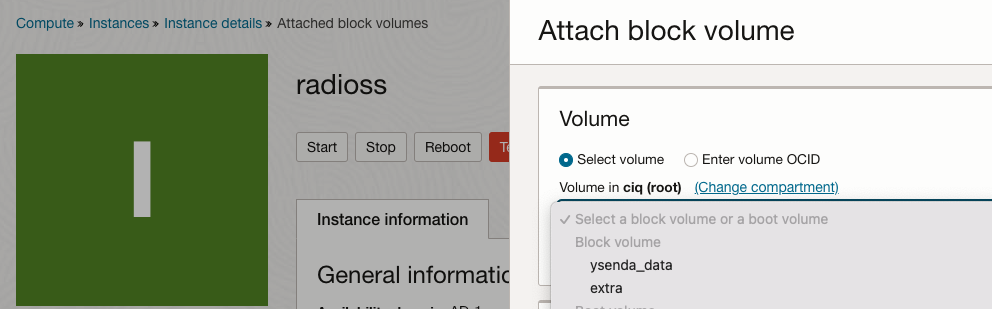
Go back to the instance page and click “Attached block volumes” > “Attach block volume.”
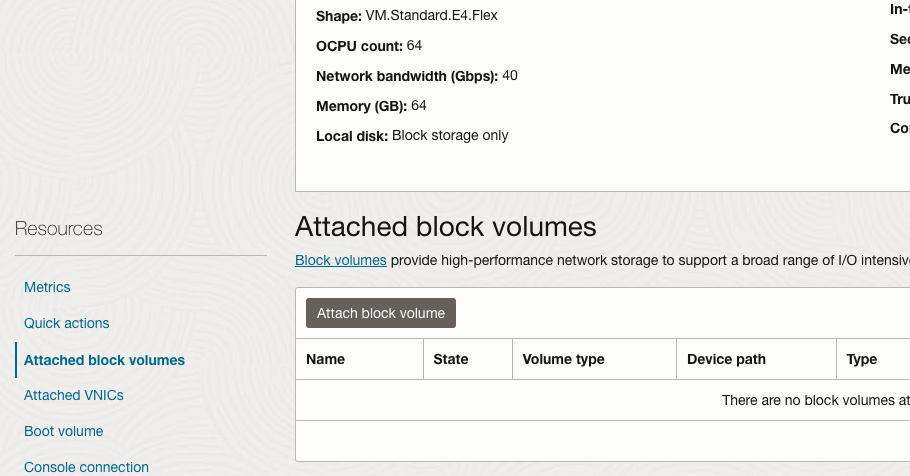
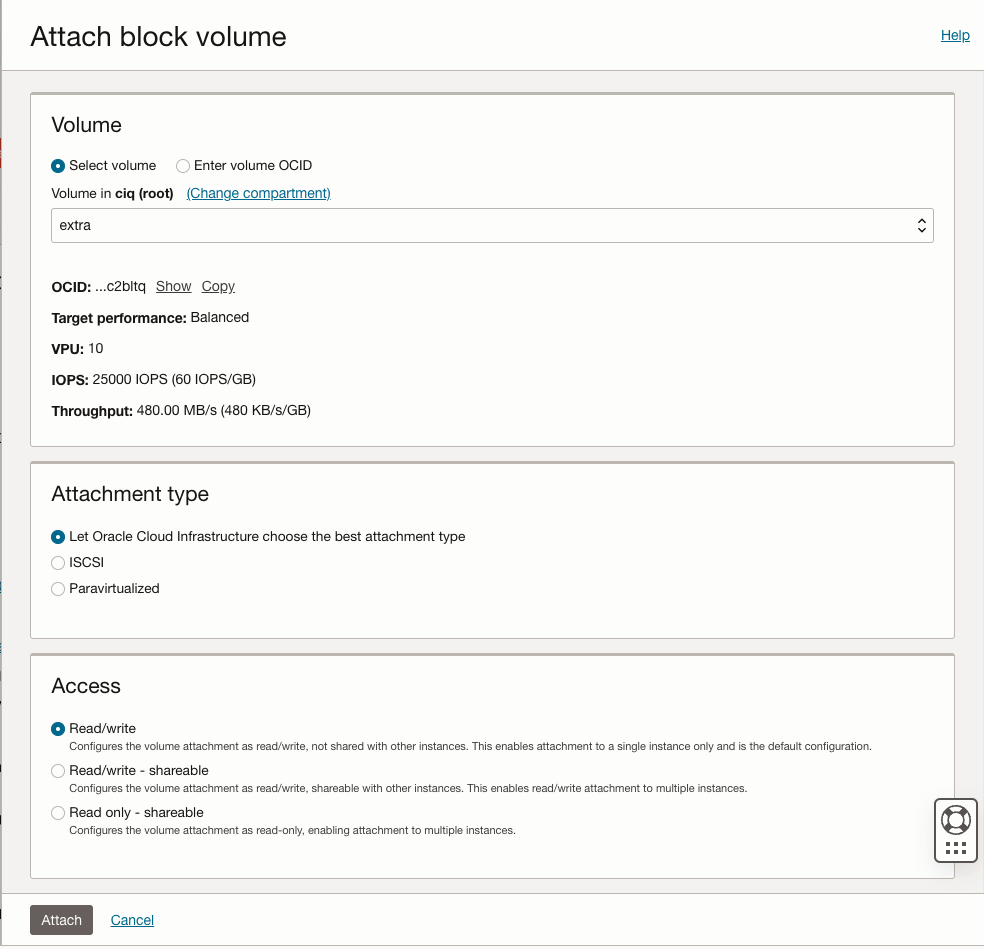
Choose the drive you created.
Click “Attach.”
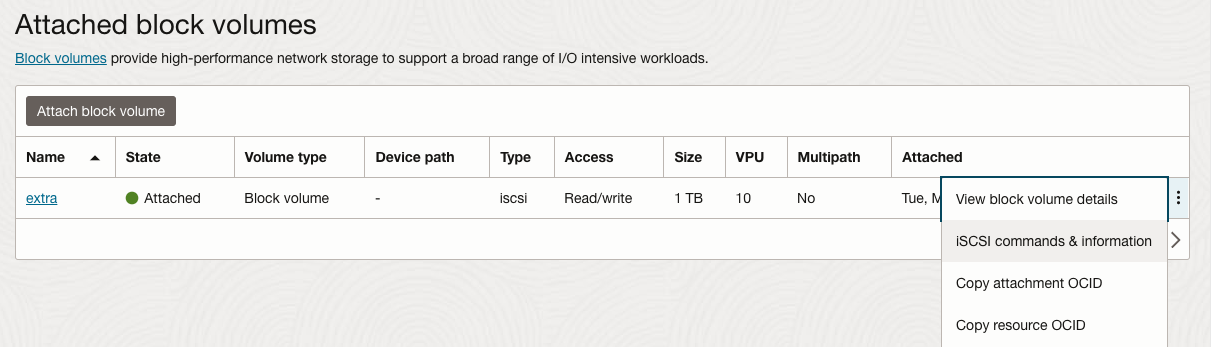
Attaching the block volumes takes about a minute.

It’s ready!

Click the menu on the right, and click “iSCSI commands & information.”
Copy command to “connect.”

Go back to your terminal and paste the command:

Check that the disk is attached correctly using “lsblk.”

Create a partition using “parted.”
$ sudo parted /dev/sdb
(parted) mklabel gpt
(parted) mkpart primary 0% 100%
(parted) quit
Create a filesystem using “mkfs.ext4.”
$ sudo mkfs.ext4 /dev/sdb1
Create a mount point “/data.”
$ sudo mkdir -p /data
Mount the extra drive to “/data.”
$ sudo mount /dev/sdb1 /data
Change permission to 777.
$ sudo chmod 777 /data
Now that you have enough space on “/data” to try all examples under “/Simulations,” copy examples from “/Simulations” to “/data” and then try the examples.
Appendix B: Detaching extra drive
Unmount “/data.”
$ sudo umount /data
Open the instance page, and click “Attached block volumes.” Open the menu and click “iSCSI commands & information.”

Copy the “Disconnect” command.
Paste the “Disconnect” command to terminal.

Click “Detach.”
Appendix C: Using openradioss.sif with /data
Copy the example from “~/Simulations” to “/data.”
$ cp ~/Simulations/Neon1m11_2017.zip /data
Unarchive the zip file.
$ cd /data
$ unzip Neon1m11_2017.zip
$ cd Neon1m11_2017
Use the Apptainer shell command with bind mount option to bind mount “/data” to openradioss container.
$ apptainer shell -B /data /usr/local/bin/openradioss.sif
Apptainer> pwd
/data/Neon1m11_2017
Apptainer>
Running a Neon 1M benchmark example takes about an hour to finish.
Apptainer> starter_linux64_gf -i NEON1M11_0000.rad -np 64
Apptainer> mpirun -np 64 engine_linux64_gf_ompi -i NEON1M11_0001.rad
When the simulation is finished, you will see an output similar to this:
                  ** CUMULATIVE CPU TIME SUMMARY **

CONTACT SORTING.............: .1063E+05     8.07 %
CONTACT FORCES..............: .1297E+04     0.98 %
ELEMENT FORCES..............: .7143E+05    54.23 %
KINEMATIC COND..............: .4094E+04     3.11 %
INTEGRATION.................: .1015E+05     7.71 %
ASSEMBLING..................: .1563E+05    11.87 %
OTHERS (including I/O)......: .1849E+05    14.04 %
TOTAL.......................: .1317E+06   100.00 %

                   ** MEMORY USAGE STATISTICS **

 TOTAL MEMORY USED .........................:    12585 MB
 MAXIMUM MEMORY PER PROCESSOR...............:      246 MB
 MINIMUM MEMORY PER PROCESSOR...............:      184 MB
 AVERAGE MEMORY PER PROCESSOR...............:      196 MB

                   ** DISK USAGE STATISTICS **

 TOTAL DISK SPACE USED .....................:       3086 MB
 ANIMATION/H3D/TH/OUTP SIZE ................:        719 MB
 RESTART FILE SIZE .........................:       2366 MB

 ELAPSED TIME     =       2069.68 s
                          0:34:29
 ESTIMATED SPEEDUP=         63.64

     NORMAL TERMINATION
     USER BREAK
     TOTAL NUMBER OF CYCLES  :  100001
Apptainer>
Running the Taurus 10M benchmark example takes about an hour to finish.
Apptainer> cp ~/Simulations/Taurus10M.zip /data
Apptainer> cd /data
Apptainer> unzip Taurus10M.zip
Apptainer> cd T10M
Apptainer> sed -i '/^\/RUN/a 0.00201' TAURUS_A05_FFB50_0001.rad
Apptainer> starter_linux64_gf -i TAURUS_A05_FFB50_0000.rad -np 64
Apptainer> mpirun -np 64 engine_linux64_gf_ompi -i TAURUS_A05_FFB50_0001.rad

When the simulation is finished, you will see an output similar to this:
                  ** CUMULATIVE CPU TIME SUMMARY **

CONTACT SORTING.............: .2968E+05    14.60 %
CONTACT FORCES..............: .2441E+05    12.01 %
ELEMENT FORCES..............: .9330E+05    45.91 %
KINEMATIC COND..............: .2055E+04     1.01 %
INTEGRATION.................: .1684E+05     8.28 %
ASSEMBLING..................: .1068E+05     5.25 %
OTHERS (including I/O)......: .2628E+05    12.93 %
TOTAL.......................: .2032E+06   100.00 %

                   ** MEMORY USAGE STATISTICS **

TOTAL MEMORY USED .........................:    59767 MB
MAXIMUM MEMORY PER PROCESSOR...............:     4070 MB
MINIMUM MEMORY PER PROCESSOR...............:      831 MB
AVERAGE MEMORY PER PROCESSOR...............:      933 MB

                   ** DISK USAGE STATISTICS **

TOTAL DISK SPACE USED .....................:      17730 MB
ANIMATION/H3D/TH/OUTP SIZE ................:       1202 MB
RESTART FILE SIZE .........................:      16528 MB

ELAPSED TIME     =       3226.62 s
                         0:53:46
ESTIMATED SPEEDUP=         62.99

     NORMAL TERMINATION
     TOTAL NUMBER OF CYCLES  :   10103
Running a Toyota Camry model takes about 2 hours to finish.
Apptainer> cp ~/Simulations/2012-toyota-camry-detailed-v5a.zip /data
Apptainer> cp ~/Simulations/CamryOpenRadioss.key
Apptainer> cd /data
Apptainer> unzip 2012-toyota-camry-detailed-v5a.zip
Apptainer> cp CamryOpenRadioss.key 2012-toyota-camry-detailed-v5a
Apptainer> cd 2012-toyota-camry-detailed-v5a
Apptainer> starter_linux64_gf -i CamryOpenRadioss.key -np 64
Apptainer> mpirun -np 64 engine_linux64_gf_ompi -i CamryOpenRadioss_0001.rad

When the simulation is finished, you will see an output similar to this:
                  ** CUMULATIVE CPU TIME SUMMARY **

CONTACT SORTING.............: .5613E+05    10.56 %
CONTACT FORCES..............: .1404E+06    26.40 %
..INCLUDING CONTACT NORMALS:  .6792E+05    12.77 %
ELEMENT FORCES..............: .1793E+06    33.71 %
KINEMATIC COND..............: .1355E+05     2.55 %
INTEGRATION.................: .2393E+05     4.50 %
ASSEMBLING..................: .3340E+05     6.28 %
OTHERS (including I/O)......: .8511E+05    16.01 %
TOTAL.......................: .5318E+06   100.00 %

                   ** MEMORY USAGE STATISTICS **

TOTAL MEMORY USED .........................:    30993 MB
MAXIMUM MEMORY PER PROCESSOR...............:      563 MB
MINIMUM MEMORY PER PROCESSOR...............:      453 MB
AVERAGE MEMORY PER PROCESSOR...............:      484 MB

                   ** DISK USAGE STATISTICS **

TOTAL DISK SPACE USED .....................:       4958 MB
ANIMATION/H3D/TH/OUTP SIZE ................:       4958 MB
RESTART FILE SIZE .........................:          0 MB

ELAPSED TIME     =       8324.31 s
                          2:18:44
 ESTIMATED SPEEDUP=         63.88

     NORMAL TERMINATION
     USER BREAK
     TOTAL NUMBER OF CYCLES  :   84061
Running a Toyota Yaris model takes about 3 hours to finish.
Apptainer> cp ~/Simulations/2010-toyota-yaris-detailed-v2j.zip /data
Apptainer> cp ~/Simulations/YarisOpenRadioss.key
Apptainer> cd /data
Apptainer> unzip 2010-toyota-yaris-detailed-v2j.zip
Apptainer> cp YarisOpenRadioss.key 2010-toyota-yaris-detailed-v2j
Apptainer> cd 2010-toyota-yaris-detailed-v2j
Apptainer> starter_linux64_gf -i YarisOpenRadioss.key -np 64
Apptainer> mpirun -np 64 engine_linux64_gf_ompi -i YarisOpenRadioss_0001.rad

When the simulation is finished, you will see an output similar to this:
                  ** CUMULATIVE CPU TIME SUMMARY **

CONTACT SORTING.............: .8854E+05    11.71 %
CONTACT FORCES..............: .1441E+06    19.06 %
..INCLUDING CONTACT NORMALS:  .8145E+05    10.77 %
ELEMENT FORCES..............: .2944E+06    38.94 %
KINEMATIC COND..............: .1924E+05     2.54 %
INTEGRATION.................: .2373E+05     3.14 %
ASSEMBLING..................: .5593E+05     7.40 %
OTHERS (including I/O)......: .1301E+06    17.20 %
TOTAL.......................: .7561E+06   100.00 %

                   ** MEMORY USAGE STATISTICS **

TOTAL MEMORY USED .........................:    25495 MB
MAXIMUM MEMORY PER PROCESSOR...............:      450 MB
MINIMUM MEMORY PER PROCESSOR...............:      375 MB
AVERAGE MEMORY PER PROCESSOR...............:      398 MB

                   ** DISK USAGE STATISTICS **

TOTAL DISK SPACE USED .....................:       9194 MB
ANIMATION/H3D/TH/OUTP SIZE ................:       5386 MB
RESTART FILE SIZE .........................:       3808 MB

 ELAPSED TIME     =      11840.29 s
                          3:17:20
 ESTIMATED SPEEDUP=         63.86

     NORMAL TERMINATION
     TOTAL NUMBER OF CYCLES  :  200848
If you would like a pdf version of this tutorial to share with your colleagues, please provide your email address below, and we’ll gladly send you a copy.


