How to Install VirtualBox Guest Additions so Rocky Linux VMs with a GUI Can Benefit from Screen Resizing
Using a virtual machine for Rocky Linux is a great way to learn the ins and outs of the operating system but it’s also a solid means of using the OS to host various types of servers, without having to purchase costly hardware for each instance.
If you prefer VirtualBox as your virtual machine manager, and you prefer to use Rocky Linux with a GUI, you might have run into a situation where you can't resize the VM window such that it's actually usable.
With some Linux distributions, you don't have to do anything to enable the VMs to resize properly. With other versions, an extra package called Guest Additions must be added (otherwise you miss out on a number of handy features… especially window resizing and shared clipboard).
But when Devices > Insert Guest Additions CD Image fails to work, what do you do? Fortunately, there's a solution but it does require a few steps to make it work. However, once you've taken care of this, your Rocky Linux VirtualBox VMs can be resized and make use of the other handy features available to the Guest Additions option.
Let's walk through the process of adding the Guest Additions option for Rocky Linux.
What you'll need
The only things you'll need for this are a running VirtualBox VM of Rocky Linux 9 and a user with sudo privileges. We'll assume you have Rocky Linux up with a working network connection and a GUI desktop environment (otherwise, you wouldn't really benefit from the Guest Additions).
With those in place, let's get to work.
Install the necessary dependencies
The first thing to be done is the installation of the kernel headers, which are required such that VirtualBox can interface with the Linux kernel.
To do this, open a terminal window and issue the command:
sudo dnf install kernel-headers -y
Next, install the remaining dependencies with:
sudo dnf install dkms gcc make kernel-devel bzip2 binutils patch libgomp glibc-headers glibc-devel -y
Download the VBoxGuestAdditions ISO
The next step is to download the VBoxGuestAdditions ISO to your host machine. Do not download the ISO to the guest machine, as you won't be able to install it from there.
So, on the machine hosting VirtualBox, download the version of the ISO that matches the VirtualBox release you have installed. You can find out which version from the VirtualBox main window, by clicking Help > About. Make sure to find the full version release number (such as 7.0.10 and not just 7.0).
With that information in hand, point your default web browser (on your host machine) to the VirtualBox download page, locate and click on the version number you require, and then (from within that folder) download the VBoxGuestAdditions_XXX.iso file (where XXX is the release number).
Install the VBoxGuestAdditions
Go to your Rocky Linux VM window and click Devices > Optical Drives > Choose A Disk File. In the resulting file chooser, navigate to the directory housing the VBoxGuestAdditions_XXX.iso file (where XXX is the release number) and double-click the file. This will install the Guest Additions.
You won't see anything happen because all this has done is mount the ISO. You can then open your File manager, and click on the VBoxGuestAdditions entry in the left sidebar. When the file manager opens the new location, click Run Software in the top right corner (Figure 1).
Figure 1
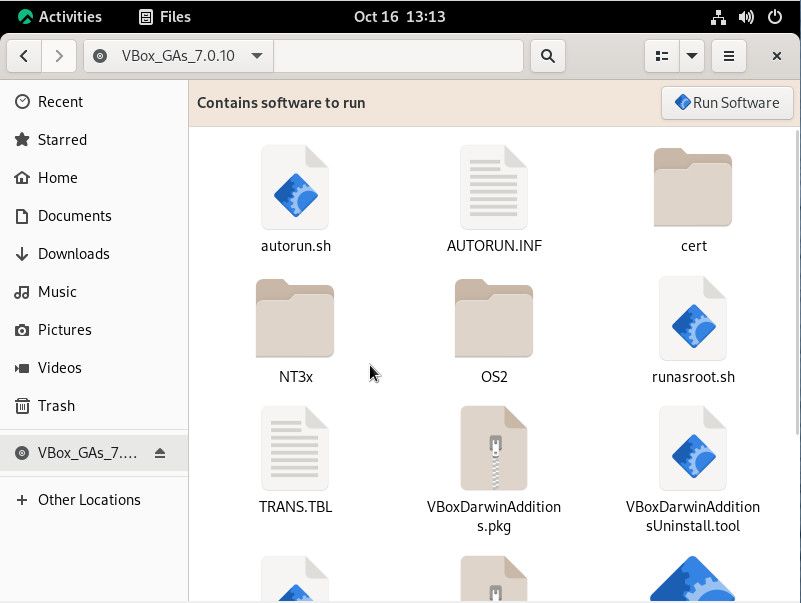
The VBoxGuestAdditions ISO has been added and the included software can be run.
When prompted, click Run and then type your sudo password. This will add the Guest Additions to your VM. When it completes, reboot Rocky Linux. When the OS is back up, log in and you should be able to take advantage of the added features (such as window resizing and clipboard sharing)


